Software Installation Administrator's Guide


Chapter 3
Starting a Miniroot Installation

For installations where fundamental IRIX services, such as filesystem management, are either unavailable or unreliable, an alternative installation method is required. The alternative method, known as a miniroot installation, relies on services in the target's programmable read-only memory (PROM) for transferring special installation tools, including Inst, from the distribution source. This transfer is referred to as loading the miniroot.

This chapter explains how to load the miniroot to start a miniroot installation. If you determine that a miniroot installation is necessary (see "Determining the Installation Method" ), you must complete the procedures in this chapter before going on to Chapter 5, "Using Inst."

This chapter contains these sections: Note: General instructions for using the PROM monitor are provided in this chapter. For PROM monitor information that is specific to a particular target model, refer to these publications:

Understanding Miniroot Installations

During a miniroot installation, the miniroot is transferred from the distribution source to the swap partition of the target workstation in a process known as loading the miniroot. The miniroot is loaded by a program called the sash, or standalone shell, which is a component of the installation tools that accompany some products (see Figure 1-1 ).

Caution: The miniroot is copied from the distribution source to partition 1 of your system disk, which is normally the swap partition. If you have customized your system in such a way that partition 1 contains valid data and another partition is used for swap, the miniroot installation will still occur in partition 1 and overwrite any data in that partition. In this case be sure to back up any data in partition 1 prior to the miniroot installation.

The miniroot contains an IRIX kernel, Inst, and other tools and files. By default, the miniroot restricts the target to installation operations, and the target operates like an ASCII terminal, even on graphics systems. These restrictions preserve the integrity of the operating system while it is being updated.

To access the installation tools, you use the PROM monitor, the user interface to the programmable read-only memory (PROM) of the target server or personal workstation. The commands that you enter using the PROM monitor load the miniroot and automatically invoke Inst. The PROM monitor features menus and prompts and a command line interpreter, the command monitor, which supports a small set of commands for performing simple functions.

The user interface to the PROM monitor varies slightly on different models of Silicon Graphics computers. For example, on graphics systems, some PROM monitor menus contain icons that you click to make selections. If you are using an older model system or an ASCII console on a graphics system, all prompts and menus appear as text. But for installation purposes, the tasks that you perform from the PROM are the same for all computer models, regardless of differences in the user interface.

Before You Begin a Miniroot Installation

If you have not already done so, complete these preparations before beginning a miniroot installation session:
  1. Check product release notes for special installation requirements.

  2. Complete network preparations if the software distribution is remote.

  3. Enable BOOTP forwarding on any routers that operate between the installation server and the target system (see "Enabling BOOTP Forwarding on Routers" for instructions).

  4. Enable TFTP access to the remote distribution server (see "Enabling TFTP Access on an Installation Server" for instructions).

  5. Verify that the guest account or an alternate account is available to Inst on the remote distribution server ( "Configuring an Installation Account" for information).
  6. Back up the target system. "Backing Up the Target Systems" for instructions).

  7. Backing up essential files on the target system is not normally required but it is strongly recommended (see
  8. Jot down the information that you will be required to supply.
  9. Be prepared to compare the IP address of the target with the address setting in the target's PROM (see "Getting the Target's Name and Address" for instructions on determining IP addresses).

  10. If your distribution source is a locally mounted CD, be prepared to specify the controller and unit number of the CD-ROM drive (see "Getting CD-ROM Device Numbers" for instructions).

  11. If your distribution source is on a remote installation server, be prepared to specify the server name and IP address, as well as the pathname of the distribution directory or CD-ROM directory on the server (see "Getting the Server's Name and Address" for instructions).
  12. Plan the software installation order.

    If you are installing from more than one CD or distribution directory, be sure to plan the order of installation (see "Planning the Order of Installation" for instructions).

Preliminary PROM Monitor Procedures

The procedure in this section is done from the PROM monitor on the target to prepare the target for miniroot loading. The procedure has three objectives: Follow these instructions to complete the preliminary PROM procedures:
  1. Shut down the target system.

    You can shut down the target system by selecting System Shutdown from the System tool. Or you can shut it down from an IRIX shell:
    % su ­ 
    Password:
    # shutdown 
    After the shutdown, you see this prompt:
    Okay to power off the system now.
         Press any key to restart.
    Note: If you do not see the previous message after the target shuts down, it means that the target contains an IP4 processor, which does not support the menu features described in steps 2 through 4. Make a note of the IP number and go directly to step 5 of this procedure.

  2. Begin the restart sequence.

    Press any key (such as <Enter>) to begin the system restart, but do not allow the restart to complete; go immediately to step 3.

    Note: If the system restarts before you are able to complete step 3, repeat steps 1 and 2 of this procedure.

  3. Go to the System Maintenance menu.

    On systems without ARCS PROMs, you see the text message shown below. Type <Esc> to go to the System Maintenance menu when you see this message:
    Starting up the system...
    To perform system maintenance instead, press <Esc>.
    On systems with ARCS PROMs, you see the Stop for Maintenance button. Click the Stop button or press <Esc> to go to the System Maintenance menu.

  4. Choose Enter Command Monitor from the System Maintenance menu.

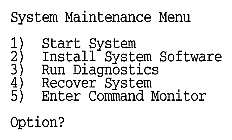
    On newer systems (those with ARCS PROMs), the System Maintenance menu is similar to the one shown in Figure 3-1 . Click the Enter Command Monitor icon on this menu.

    Fig3-2.jpg

    Figure 3-1 : System Maintenance Menu

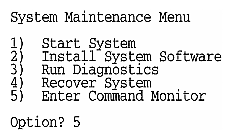
    On older systems (which do not contain ARCS PROMs), the System Maintenance menu is similar to the one shown Figure 3-2 . Type the number of the Enter Command Monitor selection. In Figure 3-2 , the number of the entry is 5.
    ch3-1.gif

    Figure 3-2 : System Maintenance Menu on Older Systems

    After your entry, the command monitor prompt is displayed. It looks similar to the one shown here:
    Command Monitor. Type "exit" to return to the menu.
    >>
  5. Use the printenv command to display PROM variable settings.
    >> printenv 
    The output of printenv shows the PROM setting for the network address as the value of netaddr, as shown in this example:
    netaddr=123.45.6.78
    If the value of netaddr is different from the target address that you obtained from the ping command (see "Getting the Target's Name and Address" ), reset the PROM address to the address that you obtained from ping. Use this command to set the address:
    >> setenv netaddr ping_address  
  6. Use the hinv command (or the version command if you do not have hinv) to display the CPU number.
    >> hinv 
    The hinv command provides the CPU type of the target. Scan the output of hinv for a number that starts with the letters IP, which is the CPU type of the target. The line looks like one of these examples:
    System: IP22
    CPU board: IP12 33 MHz, with FPU
    Make a note of the CPU type.

    Note: If the CPU type shown by hinv is IP15, the CPU is actually an IP7.

  7. Reset the default distribution source, if needed.

    If you plan to load the miniroot from a remote distribution source and you determined that the target's CPU is an IP4, IP5, IP6, IP12, or IP17, (and you have a tape drive) reset the default distribution source. Use this command to reset the default source (which is local tape):
    >> setenv notape 1 
The procedure that you use to load the miniroot depends on the location of your distribution source (local or remote) and on the CPU type of the target contains. Use one of these procedures to continue:

Loading From a Local CD

This procedure explains how to load the miniroot from a distribution CD that is mounted locally on the target. Because of PROM monitor variations, the procedure for loading the miniroot on IP4, IP5, IP6, IP7, IP9, or IP17 targets is somewhat different from the procedure on other systems.

Note: If you determined from "Preliminary PROM Monitor Procedures" that the target contains an IP4, IP5, IP6, IP7, IP9, or IP17 processor, do not complete steps 1 and 2 of this procedure. Go directly to step 3 to begin the miniroot load.
  1. Exit the command monitor.
    >> exit  
    The System Maintenance menu is displayed after your entry.

  2. Choose Install System Software from the System Maintenance menu.

    On most systems, the System Maintenance menu is similar to the one shown in Figure 3-3 . Click the Install System Software icon on this menu.

    Fig3-2.jpg

    Figure 3-3 : System Maintenance Menu

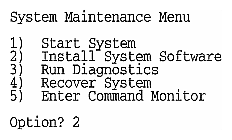
    On older systems (which do not contain ARCS PROMs), the System Maintenance menu is similar to the one shown in Figure 3-4 . Type the number of the Install System Software selection (in Figure 3-4 , the number is 2).

    ch3-8.gif

    Figure 3-4 : System Maintenance Menu on Older Systems


  3. Select the local CD-ROM icon (not required on older systems).

    On systems with ARCS PROMs, a menu of distribution sources is displayed after you choose Install System Software. Click the icon for the local CD-ROM to continue with the installation.

    If you are using an ASCII console, the menu of distribution sources appears as text. To continue, enter the number of the Local CD-ROM selection.

    On older systems, this menu does not appear; omit this step.

  4. Insert the first CD.

    Be sure to insert the CD containing the installation tools into the CD caddy with the label side up. Then insert the caddy into the CD-ROM drive.

  5. Load the miniroot and invoke Inst.

    If the target contains an IP4, IP5, IP6, IP7, IP9, or IP17 (or an IP12 other than the Indigo) processor, enter a command like the example shown below to load the miniroot and invoke Inst. Substitute the CD-ROM controller number ( cntlr), unit number (unit), and CPU number (cpu ) in your entry:
    >> dksc(cntlr,unit,8)sash.cpu -m 
    Note: Only one blank space is entered in the previous command; it follows cpu.

    On targets containing any other CPU type, click the Continue button or press <Ent>. These messages appear after your entry:
    Obtaining installation tools
    Copying installation tools to disk
As the miniroot load is completed, additional messages are displayed. Go to "Finishing the Miniroot Load" for information on interpreting these messages.

Loading From a Remote Distribution Source

The model number of the CPU in the target determines the procedure that you follow to load the miniroot from any remote distribution source (CD or distribution directory). This section contains three procedures for loading the miniroot based on CPU number: Select the procedure that is appropriate to the installation target.

Remote Loading on an IP4, IP5, IP7, or IP9

If you determined that the target's CPU number is an IP4, IP5, IP7, or IP9 (see "Preliminary PROM Monitor Procedures" ), you can load the miniroot from the command monitor. The commands that you use to perform the load depend on the location of your distribution source.

If your distribution source is a remote CD, enter the commands below to load the miniroot and invoke Inst. Substitute specific information in your entries : installation_server is the hostname of the server containing the CD, CDdir is the mount directory of the CD-ROM drive, and cpu is the target's CPU number.
>> setenv tapedevice bootp()installation_server:CDdir/dist/sa 
>> boot -f $tapedevice(sash.cpu) --m  
If your distribution source is a remote directory, enter the commands shown below to load the miniroot and invoke Inst. Substitute specific information in your entries: installation_server is the hostname of the server containing the distribution directory, distdir is the pathname of the distribution directory, sa is the command that starts the load, and cpu is the target's CPU number.
>> setenv tapedevice bootp()installation_server:distdir/sa 
>> boot -f $tapedevice(sash.cpu) --m  
Messages are displayed as the miniroot load is completed. Go to "Finishing the Miniroot Load" for information on interpreting these messages.

Remote Loading on an IP6, IP12, or IP17

If you determined that the target's CPU is an IP6, IP12, or IP17 (see "Preliminary PROM Monitor Procedures" ), use this procedure to load the miniroot and invoke Inst on the target. When you complete this procedure, go on to the instructions in Chapter 5, "Using Inst," to install software.
  1. Exit the command monitor.
    >> exit 
    After you exit the command monitor, the System Maintenance Menu is displayed, as shown in Figure 3-5 .

    ch3-9.gif

    Figure 3-5 : System Maintenance Menu on Older Systems


  2. Select Install System Software from the System Maintenance menu.

    Type 2 to install system software. After your entry, you see messages like the ones below:
    Installing System Software...
    Press <Esc> to return to the menu.
    Are you using a remote tape? (y/n) n
  3. Answer no (n) to the remote tape prompt.

    After your entry, you see a prompt like the one below:
    Enter the hostname of the server that has the installation software (e.g. hostname:directory):
  4. Load the miniroot and invoke Inst.

    If your distribution source is a remote CD, enter the command shown below to load the miniroot and invoke Inst. Substitute specific information in your entry: installation_server is the hostname of the server containing the CD, and CDdir is the mount directory of the CD-ROM drive:
    installation_server:CDdir/dist 
    If your distribution source is a remote directory, enter the command shown below to load the miniroot and invoke Inst. Substitute specific information in your entry: installation_server is the hostname of the server containing the distribution directory, distdir is the pathname of the distribution directory, and cpu is the CPU number of the target:
    installation_server:distdir 
Messages are displayed as the miniroot load is completed. Go to "Finishing the Miniroot Load" for information on interpreting these messages.

Remote Loading on an IP19, IP20, or IP22

If you determined that the target's CPU is an IP19, IP20, or IP22, use this procedure to load the miniroot and invoke Inst on the target. When you complete this procedure, go on to the instructions in Chapter 5, "Using Inst," to install software.
  1. Exit the command monitor.
    >> exit 
    After your entry, the Maintenance menu is displayed, as shown in Figure 3-6 .

    Fig3-2.jpg

    Figure 3-6 : System Maintenance Menu


  2. Select Install System Software from the System Maintenance menu.

    After your selection, a menu of distribution sources is displayed. On an ASCII console, the menu of distribution sources appears as text.

  3. Select Remote Directory as the distribution source.

    Click the Remote Directory icon to select the distribution source. If you are using an ASCII console, enter 2.

  4. Specify the hostname of the installation server.

    After you select Remote Directory, you are prompted to enter the name of the remote host that contains the distribution. Specify the hostname of the installation server, as shown in this example:
    Enter the name of the remote host:installation_server 
  5. Specify the pathname of the distribution source.

    After you enter the name of the installation server, you are prompted to enter the name of the remote distribution directory. If your distribution source is a remote CD, your entry resembles the example shown below. In your entry, substitute the mount directory of the CD-ROM drive for CDdir:
    Enter the remote directory:CDdir/dist 
    If your distribution source is a remote directory, your entry resembles the example shown below. Substitute the pathname of the distribution directory for distdir:
    Enter the remote directory:distdir 
    After your entry, you see a message like the examples below:
    Remote directory CDdir/dist from server installation_server.
    Remote directory distdir from server installation_server.
  6. Click the Install button or press <Enter> to start the miniroot load.

    After your entry, the installation tools and miniroot are copied to the target. These messages appear while the copy is in progress:
    Obtaining installation tools from server:CDdir/dist
    Copying installation tools to disk
Additional messages are displayed as the miniroot load is completed. Go to "Finishing the Miniroot Load," which follows, for information on interpreting these messages.

Finishing the Miniroot Load

Use this procedure to finish the miniroot load on all system models, from any distribution source.
  1. Wait for the miniroot to be copied.

    Copying the miniroot to the swap partition of the target takes several minutes. During that time, rows of dots appear, indicating the status of the copy ( a message bar appears instead on systems with ARCS PROMs). When the copy is completed, some informational messages are posted and the Inst Main menu is displayed. The informational messages are similar to these:
    IRIX Release version cpu Version longversion System V
    Copyright 1987-1994 Silicon Graphics, Inc.
    All Rights Reserved.
    ipg0: missing
    enp0: missing
    fxp0: missing
    These messages are normal and do not indicate a problem. One line appears for each type of device supported by the kernel, but not present on the target. After these messages, startup messages are displayed:
    Creating miniroot devices, please wait...
    Current system date is date
    Mounting file systems:
        /dev/miniroot          on  /
        /dev/dsk/dks0d1s0      on  /root
        /root/dev/usr          on  /root/usr
    Invoking software installation.
  2. Reset the system date, if needed.

    Notice that the startup messages included a posting of the system date. If the date is off by more than a few minutes, reset it with this command (see "Changing the Network Timeout Value" if you need more information):
    Inst> admin date mmddhhmmyy 
    You can display the date again with this command:
    Inst> admin date
  3. Check the distribution source that will be used for the installation.

    The location of the distribution source that you specified in the miniroot load procedure is posted in a message above the Inst Main menu (shown in Figure 5-2 ):
    Default distribution to install from: source
    For help on inst commands, type "help overview".
The miniroot is successfully loaded on the target system and Inst is invoked. Go on to the procedures in Chapter 5, "Using Inst" to install software.


Send feedback to Technical Publications.

Copyright © 1997, Silicon Graphics, Inc. All Rights Reserved. Trademark Information