A.2. Building the Kernel
The instructions in this section apply to building a custom modularized kernel. To build a monolithic kernel instead, see Section A.3 Building a Monolithic Kernel for an explanation of the different aspects of building and installing a monolithic kernel.
 | Note |
|---|---|
This example uses 2.4.20-2.47.1 as the kernel version (the kernel version might differ). To determine the kernel version, type the command uname -r and replace 2.4.20-2.47.1 with the kernel version that is returned. |
To build a custom kernel for the x86 architecture (perform all these steps as root):
Open a shell prompt and change to the directory /usr/src/linux-2.4/. All commands from this point forward must be executed from this directory.
It is important that kernel build starts with the source tree in a known condition. Therefore, it is recommended that the command make mrproper is issued first to remove any configuration files along with the remains of any previous builds that may be scattered around the source tree. If an existing configuration file already exists as the file /usr/src/linux-2.4/.config, back it up to a different directory before running this command and copy it back afterward.
It is recommended that the configuration of the default Red Hat Linux kernel be used as a starting point. To do this, copy the configuration file for the system's architecture from the /usr/src/linux-2.4/configs/ directory to /usr/src/linux-2.4/.config. If the system has more than four gigabytes of memory, copy the file that contains the keyword bigmem.
Next, customize the settings. If the X Window System is available, the recommended method is to use the command make xconfig to run the Linux Kernel Configuration.
Note To use the graphical tool started with the make xconfig command, the tk package, which provides the wish command, must be installed. For more information on installing RPM packages, refer to Part V Package Management.
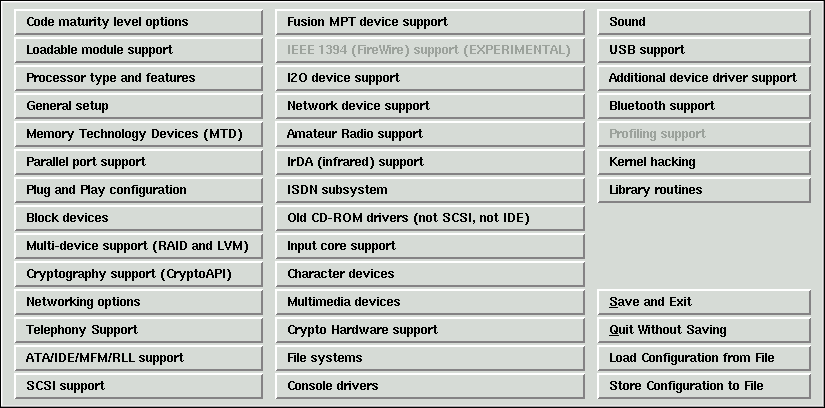
As shown in Figure A-1, select a category to configure by clicking on it. Within each category are components. Select y (yes), m (module), or n (no) beside the component to compile it into the kernel, compile it as a kernel module, or not compile it. To learn more about the component, click the Help button beside it.
Click Main Menu to return to the categories list.
After finishing the configuration, click the Save and Exit button in the main menu window to create the configuration file /usr/src/linux-2.4/.config and exit the Linux Kernel Configuration program.
Even if no changes were made to any of the settings, running the make xconfig command (or one of the other methods for kernel configuration) is required before continuing.
Other available methods for kernel configuration include:
make config — An interactive text program. Components are presented in a linear format and answered one at a time. This method does not require the X Window System and does not allow answers to be changed for previous questions.
make menuconfig — A text mode, menu driven program. Components are presented in a menu of categories; select the desired components in the same manner used in the text mode Red Hat Linux installation program. Toggle the tag corresponding to the item to be included: [*] (built-in), [ ] (exclude), <M> (module), or < > (module capable). This method does not require the X Window System.
make oldconfig — This is a non-interactive script that sets up the configuration file to contain the default settings. If the system is using the default Red Hat Linux kernel, it creates a configuration file for the kernel that shipped with Red Hat Linux for the architecture. This is useful for setting up the kernel to known working defaults and then turning off features not wanted.
Note To use kmod and kernel modules answer Yes to kmod support and module version (CONFIG_MODVERSIONS) support during the configuration.
After creating a /usr/src/linux-2.4/.config file, use the command make dep to set up the dependencies correctly.
Use the command make clean to prepare the source tree for the build.
It is recommended that the custom kernel have a modified version number so that the existing kernel is not overwritten. The method described here is the easiest to recover from in the event of a mishap. For other possibilities, details can be found at http://www.redhat.com/mirrors/LDP/HOWTO/Kernel-HOWTO.html or in the Makefile in /usr/src/linux-2.4.
By default, /usr/src/linux-2.4/Makefile includes the word custom at the end of the line beginning with EXTRAVERSION. Appending the string allows the system to have the old working kernel and the new kernel (version 2.4.20-2.47.1custom) on the system at the same time.
If the system contains more than one custom kernel, a good method is to append the date at the end (or another identifier).
Build the kernel with make bzImage.
Build any modules configured with make modules.
Use the command make modules_install to install the kernel modules (even if nothing was actually built). Notice the underscore (_) in the command. This installs the kernel modules into the directory path /lib/modules/<KERNELVERSION>/kernel/drivers (where KERNELVERSION is the version specified in the Makefile). In this example it would be /lib/modules/2.4.20-2.47.1custom/kernel/drivers/.
Use make install to copy the new kernel and its associated files to the proper directories.
In addition to installing the kernel files in the /boot directory, this command also executes the /sbin/new-kernel-pkg script that builds a new initrd image and adds new entries to the boot loader configuration file.
If the system has a SCSI adapter and the SCSI driver was compiled as a module or if the kernel was built with ext3 support as a module (the default in Red Hat Linux), the initrd image is required.
Even though the initrd image and boot loader modifications are made, verify that they were done correctly and be sure to use the custom kernel version instead of 2.4.20-2.47.1. Refer to Section 30.5 Verifying the Initial RAM Disk Image and Section 30.6 Verifying the Boot Loader for instructions on verifying these modifications.